Showing posts with label Recipes That Rock. Show all posts

Tuesday, December 6, 2016

Almond-Crusted Tilapia and Roasted Sheet Pan Veggies

We used to eat poultry as our dinner protein a majority of the week until this summer. Now we try follow a more vegetarian/pescatarian diet, and I'm having lots of fun finding fun seafood recipes to try and add to my recipe book. I'm not a huge fan of plain tilapia since I think it's a pretty bland fish, so I'm always on the hunt for recipes that give it a little extra oomph.

I'm so glad I came across this recipe in my All Recipes magazine! I love almonds, so this was an added bonus for this recipe. It's fairly simple to throw together with the help of a blender or food processor, and thanks to the almonds, the leftovers are still crispy/crunchy the next day unlike many other "breaded" fish and poultry I've tried.

I have never made enough of this to serve 8 people, so I've simply reduced the ingredients a bit based on how many people I'm serving.

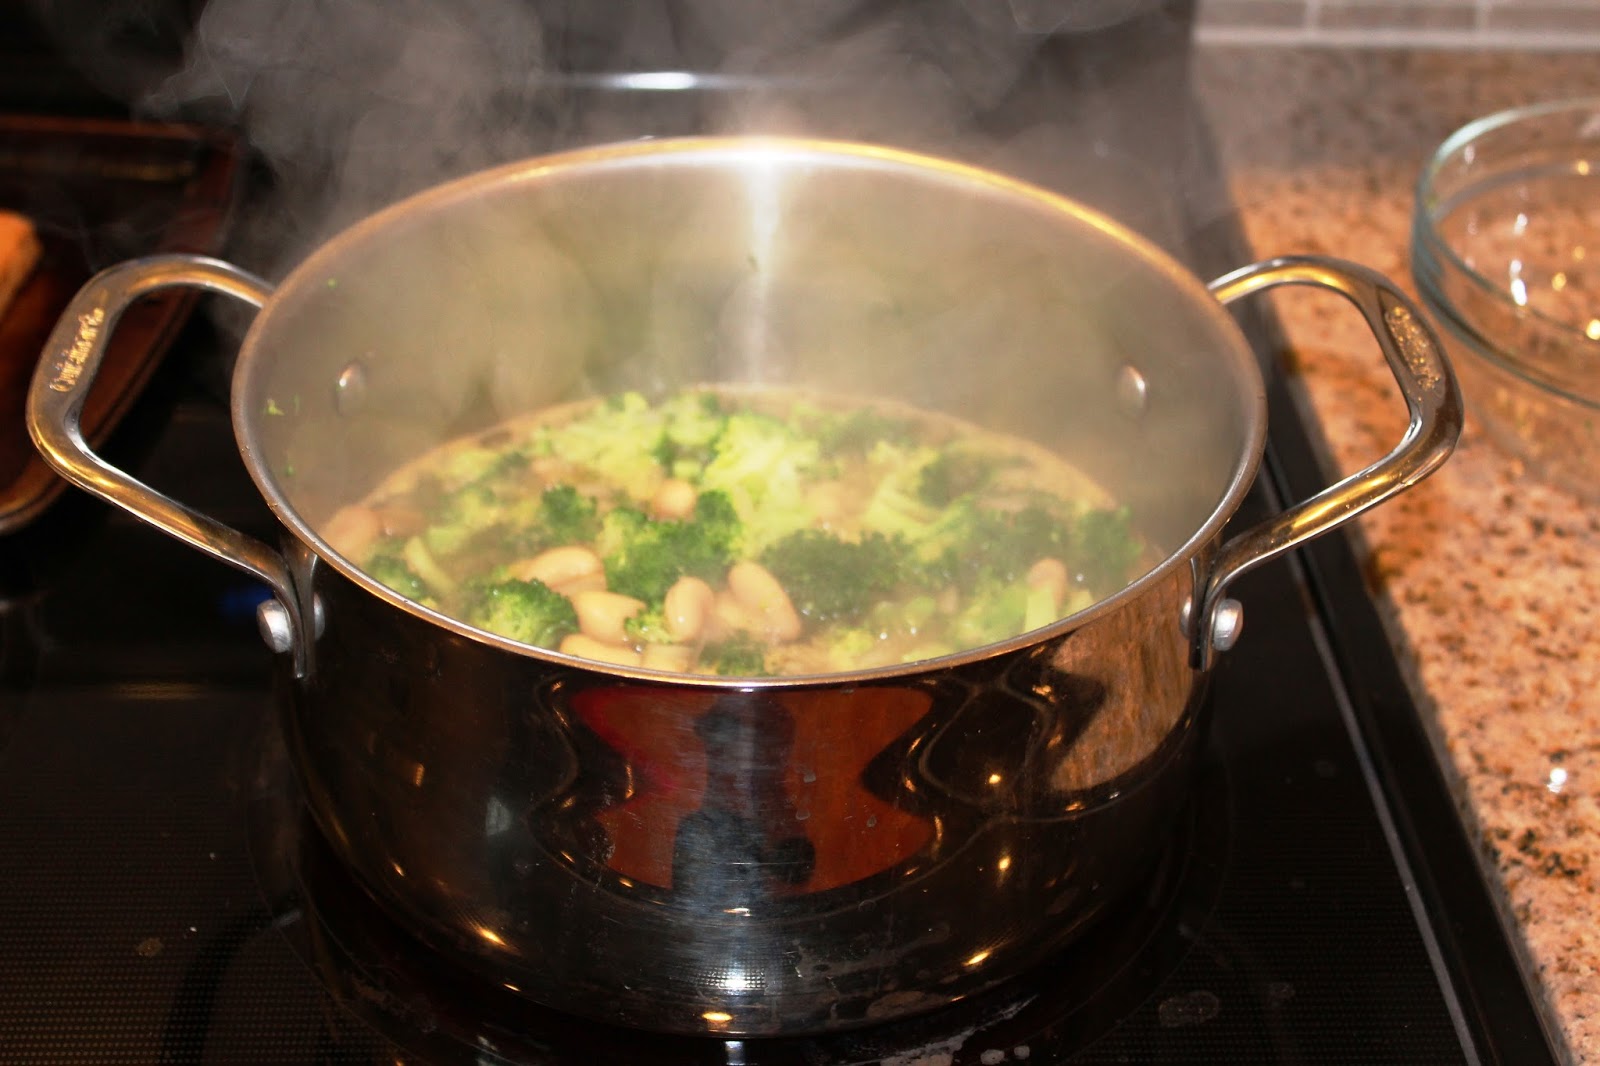
Additionally, I'm finding myself making roasted veggies as a side a lot in the fall and winter months, so I thought I'd share my go-to recipe for that, as well. It goes well with pretty much anything and is so easy to do. I am always sure to have potatoes, carrots, and broccoli on hand just in case I get a hankerin' for roasted veggie deliciousness. The leftovers are also scrumptious!


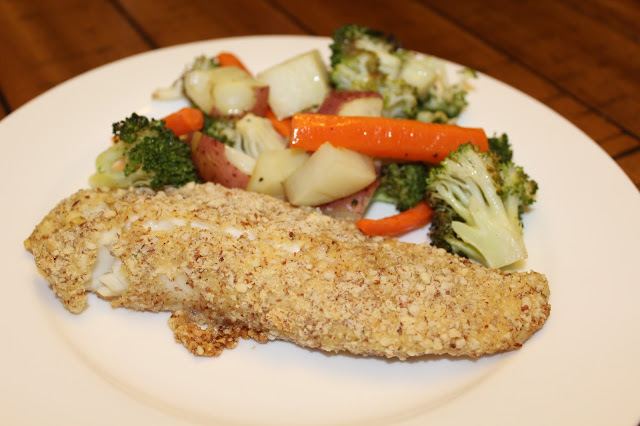
Almond Crusted Tilapia
Serves 8

What you'll need:
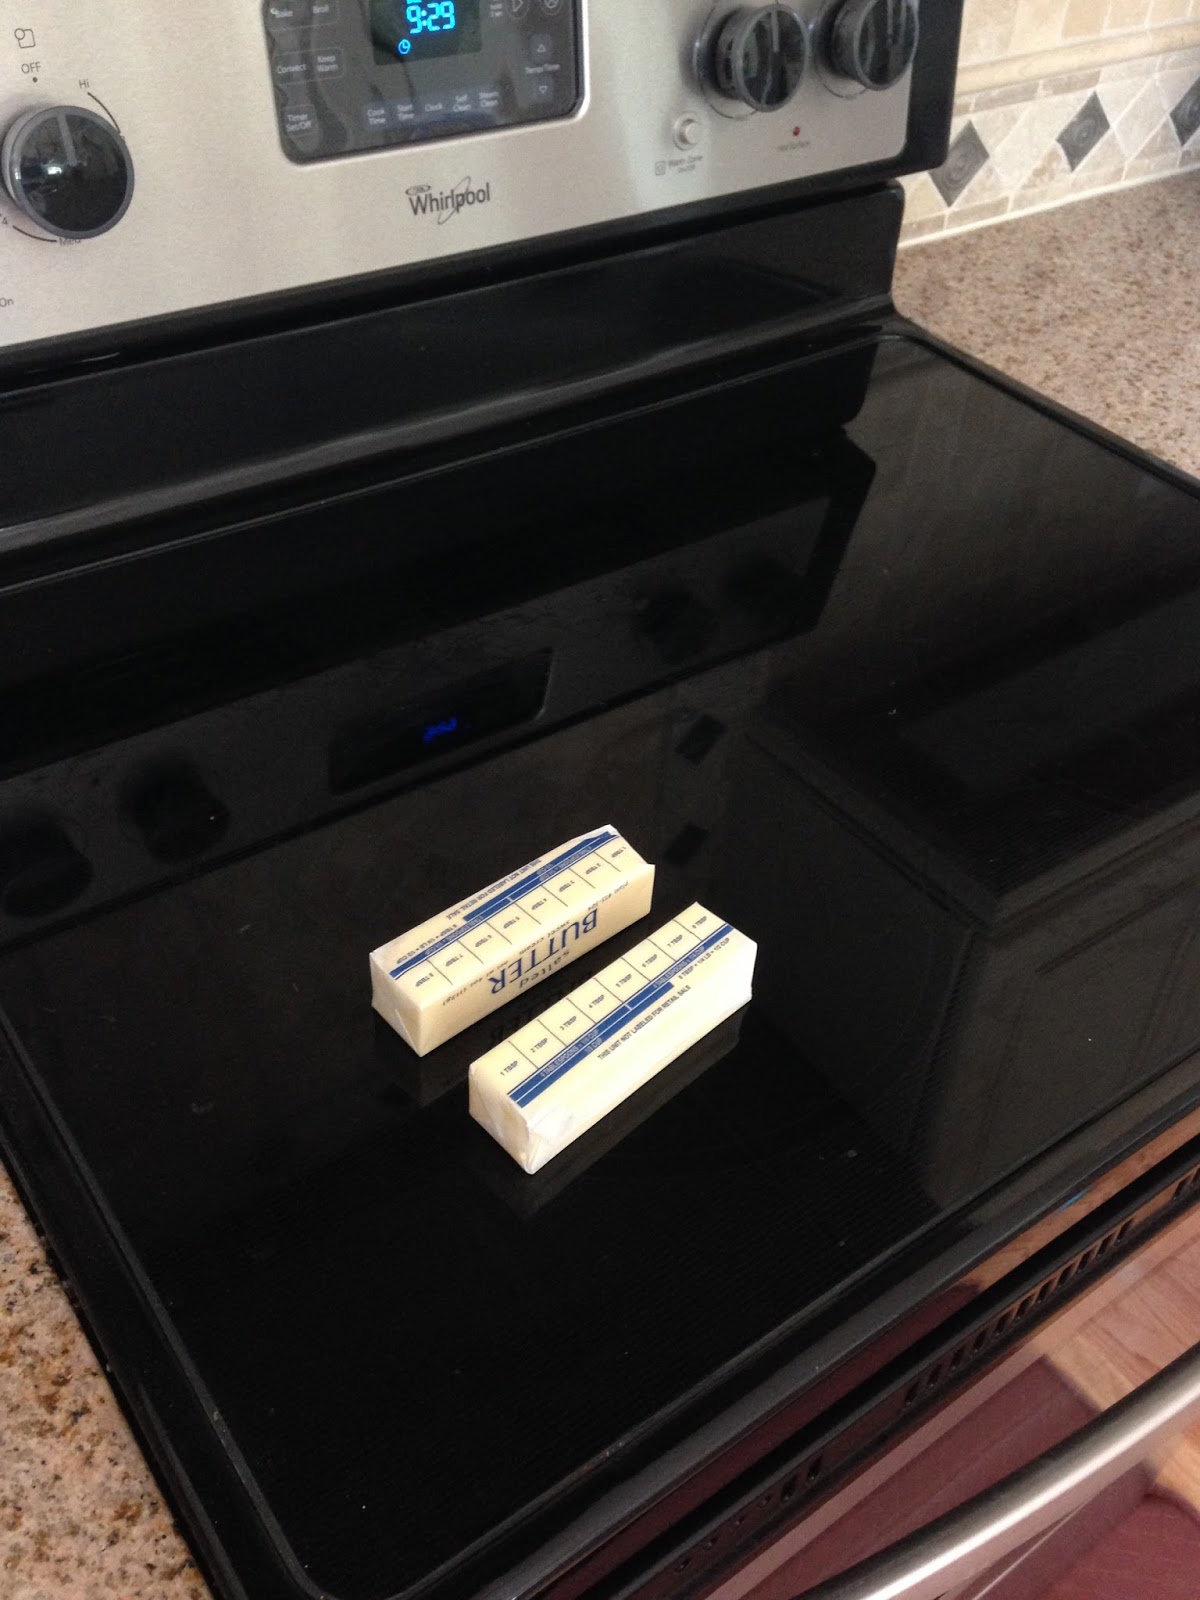
  • 3 tablespoons butter, softened
  • 1/3 cup flour
  • 1 teaspoon lemon pepper *I did 1/2 teaspoon pepper, then squeezed  fresh lemon juice on the fillets once they were coated
  • 1 teaspoon garlic powder
  • 1 teaspoon salt
  • 2 large eggs
  • 1 1/4 cups finely ground almonds with skins
  • 1 1/4 cups grated Parmesan cheese
  • 8 6-oz. tilapia fillets *I used frozen tilapia loins from Costco (thawed before cooking, of course)

What you'll do:
  1. Preheat oven to 450 degrees. Spread butter over bottom of a 12x17-inch rimmed baking sheet (add a layer of foil for easier clean up!)
  2. Stir together flour, spices, and salt in a shallow bowl or pie plate.
  3. Whisk eggs in separate shallow bowl or pie plate until combined.
  4. Combine ground almonds and cheese in separate shallow bowl or pie plate.
  5. Dredge each fillet in flour mixture, shaking off any excess, then dip in egg, letting excess drip off. Finally, dredge each fillet in almond mixture, coating both sides, and transfer to prepared baking sheet.
  6. Bake until fish flakes easily with a fork, about 10 minutes.


Roasted Sheet Pan Veggies

What you'll need:
  • An assortment of your favorite roasting vegetables: carrots, red potatoes, onions, squash, broccoli, cauliflower, etc. (my faves are carrots, potatoes, and broccoli)
  • Olive oil
  • sea salt
  • fresh ground pepper
What you'll do:
  1. Preheat oven to 400 degrees.
  2. Line a cookie sheet with foil, then drizzle olive oil on top.
  3. Wash, peel (when necessary), and chop your veggies. Carrots should be in slightly uniform chunks (unless you're using baby carrots), broccoli or cauliflower in florets, potatoes and squash in uniform chunks.
  4. Arrange veggies in single layer on cookie sheet. Drizzle with more olive oil and season with sea salt and pepper. Toss slightly to coat.
  5. Roast for 15-20 minutes or until you can easily pierce the veggies with a fork and they feel soft. *If you're making this to accompany the tilapia above, you can put them in the same oven at 450, just keep an eye on them...they'll probably only need 10-12 minutes.

This is SO good, y'all! Enjoy!


Thursday, November 17, 2016

Vegetarian Chili

I promised weeks ago that I'd share the recipe for the vegetarian chili I made for the Fall Extravaganza and I'm just now getting around to it. Sorry for the delay...just trying to teach you all patience (I just know you've been waiting on pins and needles for this lol).

All jokes aside, this chili is pretty darn delicious. I've always been a meaty chili girl, but this 3-bean, meatless version gets the job done! I found the recipe in my All Recipes magazine, and I made it once before I made a triple-recipe version for the party. It's easy to increase this recipe for a large group, and the leftovers are just as good as eating it straight from the pot. We had a good amount of chili leftover from the party, so we just froze individual servings in freezer bags. When we want to enjoy it again, we just thaw it a little, then heat it on the stove. It's great with a side of cornbread (or you can throw the cornbread on top like me) and a sprinkle of cheddar cheese, as well!


Vegetarian Chili

What you'll need:
  • 1/4 cup vegetable oil
  • 1 onion, cut into small dice
  • 1 red bell pepper, cut into small dice
  • 1 green bell pepper, cut into small dice
  • 1 jalapeno, seeded and minced (add the seeds if you like it spicy!)
  • 4 cloves garlic, minced
  • 1/8 teaspoon salt
  • 2 tablespoons chili powder
  • 2 teaspoons ground cumin
  • 2 teaspoons dried oregano
  • 1/2 (6-ounce) can tomato paste (5 tablespoons)
  • 1 28-ounce can diced tomatoes
  • 1 3/4 cups water
  • 3 (15.5 ounce) cans beans (a mixture of black beans, kidney beans, and chickpeas)
  • Optional: sour cream, shredded cheddar cheese, and fresh cilantro leaves 

What you'll do:
  1. Heat oil in a heavy 6-quart pot over medium heat. Cook onion, bell peppers, jalapeno, garlic, and salt, stirring occasionally, until tender, about 10 minutes.
  2. Stir in spices, tomato paste, tomatoes, and water and simmer over medium-low heat, stirring occasionally, until thickened, about 20 minutes.
  3. Drain beans, reserving liquid, and rinse under cold water. Add beans and 3/4 cup reserved liquid to chili and simmer, stirring occasionally, until heated through, 5-7 minutes.
  4. Top each serving with sour cream, cheese, and cilantro, if using.


This is great for the cold-weather months we have in store this winter! I hope you enjoy it!


Tuesday, September 13, 2016

No-Cream Cream of Broccoli Soup

Victor and I have been trying to eat more vegetarian-y lately, with more plant-based protein and fiber. It's been a little tough for me to come around to since I'm used to having some sort of animal protein with each meal, but now that I've been finding and making these new recipes, I'm really starting to enjoy this new way of eating. An added bonus is that it's super healthy, and the scale is responding accordingly (bye bye pregnancy weight!).

My meal-planning routine has changed a bit as a result of these new eating habits. A lot of our old favorites have become "sometimes" meals, so I need to find lots of new recipes. I subscribe to Everyday with Rachael Ray and All Recipes magazines, and I love browsing through them to find new meals that fit our new dietary needs. I've found some great ones so far, one of which is this No-Cream Cream of Broccoli Soup from Rachael Ray.


Y'all, this is so good, I've made it twice in the past week, and I've had two bowls each time I made it (guilt-free). It's also pretty quick and easy to prepare. Best of all, it's healthy, packed with fiber and protein! The first time I made this, I used an immersion blender and blended it all up in the pot. NOT recommended...what a (literal) HOT mess!

No-Cream Cream of Broccoli Soup

What you'll need:

  • 1 tbsp olive oil
  • 1/2 cup sliced leek, white part only (I used 1/2 cup chopped onion instead)
  • 2.5 cups low-sodium vegetable broth
  • 1 can (15 oz.) cannellini beans, rinsed and drained
  • 1 head (1 lb.) broccoli, chopped
  • 1/2 tsp lemon zest plus 1 tbsp juice
  • 1/4 cup shaved Parmesan (or shredded cheddar)
What you'll do:
  1. In a pot, heat the oil over medium-high. Cook the leek (or onion), stirring often, until tender, 2-3 minutes (less time if using onion).
  2. Add the broth and beans. Bring to a simmer.
  3. Add the broccoli. Cook until tender, approximately 5 minutes.
  4. Working in batches, puree the soup in a blender (I used the cup attachment for my immersion blender and poured blended portions into a bowl; see photos). 
  5. Return soup to pot when finished. Add the lemon zest and juice. Season with salt and pepper. Then heat over medium-high until warm, about 2 minutes, stirring occasionally.
  6. Divide among bowls, top with cheese and black pepper.


I'm not kidding you guys. This is so good. I'm probably going to make it every week until I get sick of it. The pureed beans make this creamy, but without the guilt.


The first time I made this, I paired it with baked salmon. This time, I made this Perfect Ten Baked Cod from All Recipes. I've never made cod before, but this was pretty good!

Let me know if you try this!

Wednesday, August 24, 2016

Recent recipes I've tried and loved

I am most definitely not creative when it comes to cooking. I very much prefer to have a recipe to work from, especially when I'm trying something new. When I get comfortable with a particular dish, I don't rely much on the measurements and kind of make it my own, but until I've made something several times, the perfectionist in me continually refers to the recipe for guidance.

Thankfully, there are lots of resources out there to help me with my meal planning, from cookbooks to websites and blogs. One of my favorites is the Skinnytaste website. Her recipes are all healthy and flavorful. She also has two cookbooks (which I don't have...yet. Asking for cookbooks for my birthday/Christmas), one of which is coming out in October, and it's full of new recipes that aren't on her website. I can't wait to add them to my cookbook collection!

This week, I tried her baked zucchini sticks and her Southwestern black bean salad. Both were excellent and come highly recommended by moi. Victor and I are trying to go more vegetarian for a majority of the week, so we're incorporating a lot more veggies and legumes into our meals. These two recipes fit the bill perfectly.

via

I followed the recipe exactly for the zucchini sticks and loved how they turned out. I tried to pass them off as French fries to Max but he called my bluff. Better luck next time! I'm a huge fan of her zucchini tots and have been making them for years, and these have a very similar flavor but are much less work. However, if I'm being completely honest, I still prefer the tots!

via
I decided to make the Southwestern Black Bean Salad as a main dish for dinner last night even though Gina recommends it as a starter or a side. I made a couple of changes to the recipe, though. I omitted the cilantro (not a fan) and substituted yellow onion for red onion (also not fond of red onion). I also added some chopped green pepper. This thing was delicious!!! We had a French baguette that I heated in the oven for this dinner, and I topped a few pieces topped with some mashed avocado and a spoonful of this salad and it was heavenly. Definitely make this before summer is over!

I've also been chomping at the bit to make some roasted chickpeas for a while, and I finally made these Roasted Honey-Cinnamon Chickpeas on Monday night. I was surprised by how much I loved them. It's like you're guiltless-ly indulging a fiber-and-protein-packed dessert. I would go so far as to say that I would be happy noshing on these while watching a movie in our theater room instead of popcorn. They're THAT good. It's best to eat these when they're still warm from the oven, though. I had some left over and saved them in a glass tupperware overnight. They definitely lost their crunch but were still pretty tasty.


And lastly, an oldie but a goodie, Spinach Lasagna Rolls are on the menu for Sunday night this week. I've made them a bajillion times. They're so good.

Some recipes that I haven't tried yet but can't wait to whip up are: 
Cream of Zucchini Soup from Skinnytaste
Herbed Sun-Dried Tomato Chickpea Burgers from Minimalist Baker (also want her cookbook)


Also, I'm not being paid to say or share any of this. I just love sharing what I love with you all! Let me know if you try any of these recipes! Which sounds best to you?

Tuesday, March 22, 2016

Recipes That Rock | Mexican Stuffed Shells

We've made the switch from "Taco Tuesdays" to "Mexican Mondays" in our house because someone was getting tired of tacos each week (who gets tired of tacos???). I've been looking for various Mexican-inspired recipes to add some variety to our Monday night meals. These stuffed shells have been in my recipe binder for years now, but I haven't made them in a while. I'm so glad I decided to whip these up this week because I forgot how yummy they are! I admittedly forgot to buy salsa at the grocery store Monday morning, but luckily I had a can of Rotel diced tomatoes and green chilies in our pantry, which was a great substitute!


Mexican Stuffed Shells


Ingredients:

  • 1 pound ground beef or turkey
  • 1 package taco seasoning (or one recipe homemade taco seasoning)
  • 4 oz. cream cheese
  • 14-16 jumbo pasta shells
  • 1.5 cup salsa
  • 1 cup taco sauce
  • shredded cheddar cheese
  • shredded Monterrey Jack cheese
  • Optional toppings: green onions, black olives, sour cream
Directions:
  1. Preheat oven to 350 degrees.
  2. In a non-stick pan, cook ground meat (I sometimes like to add some chopped green pepper and onion to the ground meat to add a little more flavor and veggies). Add taco seasoning and prepare according to package/recipe directions. Add cream cheese; cover and simmer until cheese is melted. Blend well. Set aside and cool.
  3. While ground meat is cooking, cook the pasta shells according to directions and drain. Set shells out individually on cutting board/baking sheet so they don't stick together.
  4. Pour salsa on the bottom of a 9 x 13 inch baking dish. Stuff each shell with the meat mixture. Place shells in the dish open side up. Pour taco sauce over shells.
  5. Cover dish with foil and bake for 30 minutes. Uncover and top each shell with shredded cheese. Bake uncovered an additional 10-15 minutes. Top with desired toppings.


I'm looking forward to these leftovers for lunch today!

Tuesday, February 23, 2016

Recipes That Rock | Milk and Cookies Lasagna

Do you love Chips Ahoy? How about Cool Whip? If you answered no to those questions, you're either my brother-in-law who doesn't like sweets (I wish I had that problem), super health-conscious (I wish I had the willpower), or just weird. 

Truth time: when I find myself in my house with Chips Ahoy and Cool Whip (which is rare), I dip those cookies in the Cool Whip until I have a stomach ache. If there's no Cool Whip, I just dip 'em in milk. It's just so darn good. So you can imagine my excitement when I came across this recipe for Milk and Cookies Lasagna on Pinterest. I had 2 8oz. tubs of Cool Whip left over from our Friendsgiving, and I wanted to use them up somehow. So I searched "dessert" and "cool whip" on Pinterest and this little ditty popped up. This is so super easy to make (no baking required!); the worst part is waiting for it to chill for 6 hours before you can eat it! I made this last weekend for our family dinner with Victor's family, and it was well-received!


Milk and Cookies Lasagna

Ingredients:
  • 2 packages Chips Ahoy cookies
  • 2 containers Cool Whip (I had 2 8oz. ones, and just barely needed to bust into the second one)
  • Hot fudge sauce (I used Hershey's chocolate syrup)
  • 1 1/2 cups milk for dipping

Directions:
  1. Find an 11x7 glass baking dish (this might also look lovely in a trifle dish, but you would probably need more cookies and Cool Whip to fill it). 
  2. Create a layer of cookies by dipping each cookie into the milk and lining them in the bottom of the dish. You only need to dip for a second. 
  3. Spread on a layer of Cool Whip. 
  4. Repeat steps 2 and 3 until you reach the top of the dish. I did 3 layers of each.
  5. Top the last layer of Cool Whip with crumbled cookies and chocolate syrup. 
  6. Refrigerate at least 6 hours before serving.

The cookies get pretty soggy in this finished product (duh, you dunk them in milk first!), but the chocolate chips still give it a good crunch, if you're into textures. I think this might be even better with some layers of sliced strawberries or other fruit, too!


Wednesday, January 27, 2016

Recipes That Rock | Nutella Hot Chocolate

This wintery weather has me craving all the cozy things, and hot chocolate is no exception! I enjoy a Swiss Miss hot chocolate packet as much as the next person, but when I came across this Nutella hot chocolate recipe a few weeks ago, I knew I had to give it a try! Luckily I had a jar of Nutella in my pantry just waiting to be scooped into!

If you love Nutella as much as I do (and I love it A LOT. On our honeymoon in Paris, my breakfast every day was a croissant with Nutella), you NEED this hot chocolate in your life! It's simple and only requires 3 ingredients (although 1 could probably be eliminated) and your stovetop.


Nutella Hot Chocolate
Yields one monster mug (or two small-ish mugs) of deliciousness

Ingredients:
  • 1 . 5 cups milk (I used almond milk)
  • 3-4 tablespoons Nutella (depending on how chocolatey you want it)
  • 1/8 teaspoon vanilla (this is the possibly unnecessary ingredient)
Directions:
  1. Heat 1/2 cup of milk and Nutella in a small saucepan on medium heat. Whisk until well-blended.
  2. Add vanilla.
  3. Add remaining milk and turn up heat slightly. Whisk constantly until warmed through.
  4. Pour into mug(s), top with your choice of toppings, and enjoy!
Of course I have an Ellen mug
Now just make sure your pantry is always stocked with Nutella in these cold winter months, and you'll never be without this scrumptious warm treat!

Good to the last sip!

Thursday, November 19, 2015

Recipes That Rock | Pumpkin Roll

I have decided that I want to make "baking a pumpkin roll" a tradition in my family, likely for Thanksgiving. It's such a yummy dessert, and it is messy and fun to make--a true labor of love. I think it will be something my kids will look forward to making each year, and one day I'll pass down my favorite recipe to them.

My pumpkin roll skills are a little rusty since I've taken a 2 year hiatus from making one, so I thought I'd make one this week for our Friendsgiving on Sunday before making one with my sister for our big family Thanksgiving next week. You all reap the benefits of this practice roll since I took lots of photos so I could share the recipe with you!

I love this recipe mostly because of the cream cheese filling. I've had other pumpkin rolls that have a more cake-frosting-like filling, and they don't hold a candle to this one. The combination of sweet and tangy is simply perfection.


Pumpkin Roll

Ingredients:

For the cake:
  • 3/4 cup all-purpose flour
  • 1/2 teaspoon baking powder
  • 1/2 teaspoon baking soda
  • 1/2 teaspoon ground cinnamon
  • 1/2 teaspoon ground cloves
  • 1/4 teaspoon salt
  • 3 large eggs
  • 1 cup granulated sugar
  • 2/3 cup LIBBY'S 100% Pure Pumpkin
  • 1 cup walnuts, chopped (optional--I never use the walnuts)
  • 1 dish towel and powdered sugar (for rolling up the cake)
For the filling:
  • 1 pkg. (8 oz.) cream cheese, at room temperature
  • 1 cup powdered sugar, sifted
  • 6 tablespoons butter or margarine, softened
  • 1 teaspoon vanilla extract
  • Powdered sugar (optional for decoration)
Directions:

For cake:
  1. Preheat oven to 375 degrees.  Grease a 15 x 10 inch jelly roll pan and line with wax paper. Grease and flour paper. Sprinkle a thin, cotton kitchen towel with powdered sugar and set aside. Be sure to put enough powdered sugar on the towel to keep the cake from sticking (be very generous).
  2. Combine flour, baking powder, baking soda, cinnamon, cloves, and salt in a small bowl. Beat eggs and granulated sugar in large mixer bowl until thick. Beat in pumpkin. Stir in flour mixture. Spread evenly into prepared pan.  Sprinkle with nuts, if using. 
  3. Bake for 13-15 minutes or until top of cake springs back when touched. (**If using a dark colored pan, begin checking for doneness at 11 minutes.**)  Immediately loosen and turn cake onto prepared towel. Remove wax paper. Roll up cake and towel together, starting with the narrow end. Cool completely on wire rack. 
For filling:

Beat cream cheese, 1 cup powdered sugar, butter and vanilla extract in small mixer bowl until smooth.

Once cake has cooled (about 40 minutes to an hour after rolling in towel):

Carefully unroll cake. Spread cream cheese mixture over cake. Re-roll cake and wrap in plastic wrap. Refrigerate at least one hour. Sprinkle with powdered sugar before serving, if desired. Slice and enjoy!


There were no complaints from me when it came time to lick the knife...and spoon...and bowl after this step.


I'm going to have to hide this in the back of the fridge so I don't eat any more of it before Sunday.  It's so good, even Max approves...and he's been pretty picky lately!


I hope you enjoy this recipe as much as we do!  

Tuesday, November 3, 2015

Recipes That Rock | Pumpkin Dip

So, I have actually managed not to go overly crazy on pumpkin-flavored food and beverages this fall. I think I've only had 2 pumpkin spiced lattes so far, and I haven't attempted to make my own pumpkin roll yet this year, either.  Don't get me wrong, I love most things that taste like pumpkin, but I guess I've decided to exhibit some willpower this year.

That is...until we had plans to go to our friend's house for Halloween dinner and I wanted to bring something fun and fall-y in addition to my cakepops (side note: don't bother making cakepops for Halloween. People just want to eat candy).  I had been to a restaurant a couple years ago that served a pumpkin dip with ginger snaps, and it was so. good.  I wanted to find something similar, so I browsed Pinterest for about 2.5 seconds and came across the recipe below.  

You're welcome.  Seriously.

Fall Pumpkin Dip


Ingredients:

  • 1 can (15 oz.) pumpkin puree
  • 1 box (5 oz.--although I used the 3.4 oz one) Instant vanilla pudding mix (you'll just use the powder, don't make the pudding)
  • 16 oz. Cool Whip (you can use Lite)
  • 1/2 tablespoon (about 1.5 teaspoons) Pumpkin Pie Spice
  • 1/2 tablespoon (about 1.5 teaspoons) cinnamon
Directions:
  1. Mix pumpkin, pudding mix, Cool Whip, pumpkin pie spice, and cinnamon in a very large bowl by hand.
  2. Cover and chill for several hours before serving.
  3. Serve with fresh apple slices, Nilla Wafers, graham crackers, or ginger snaps.

I said it before and I'll say it again...you're welcome.  It tastes like pumpkin pie.  Light, airy pumpkin pie.  It's sinful.  If your pumpkin pie isn't pumpkin pie-y enough, you could throw this on top instead of whipped cream and take it totally over the top. 


This recipe yields a large amount of this dip.  I mean, you're starting with 16 oz. of whipped cream and 15 oz. of pumpkin.  It's a lot.  But it's good.

Let me know if you try it!

Thursday, October 1, 2015

Recipes That Rock | Roasted Broccoli

One night each week, I make salmon, steamed broccoli, and quinoa for dinner for our family.  It's a big hit with everyone, especially Max.  He LOVES salmon, and he's started to come around to the quinoa, as well.  He still needs convincing on the broccoli though.  

Steamed broccoli is yummy and very good for you.  But sometimes that gets boring.  I wanted to do something a little different last night, so I pulled out an old favorite recipe for roasted broccoli that I haven't made in a few years.  And let me tell you, it did not disappoint.

"Better Than Steak" Roasted Broccoli
(this is what the original recipe claimed.  You be the judge)


I don't remember where I got this recipe.  But it's great.

Ingredients:
  • 4-5 pounds broccoli (or 2 large heads), cut into big florets, thoroughly dried
  • Olive oil
  • salt
  • pepper
  • 4 garlic cloves
  • freshly shredded Parmesan cheese
  • lemon juice
Directions:
  1. Preheat oven to 375 degrees.
  2. Be sure broccoli florets are completely dried.  Place on foil-lined cookie sheet.
  3. Toss broccoli with olive oil, salt, and pepper.
  4. Slice or mince garlic cloves and toss with broccoli. 
  5. Roast in oven for 15-20 minutes, or until "crisp-tender" and the tips of some florets are browned.
  6. After roasting is complete, remove from oven and zest/squeeze lemon juice over broccoli.  Add a bit more olive oil and 1/3 cup of Parmesan cheese.

When I made this last night, I omitted step 6 and it was still delicious, but I do think the lemon juice and cheese give it an extra little something.

Give it a try!  I'm sure you won't be disappointed!

Tuesday, September 15, 2015

Recipes That Rock | (Leftover) Quinoa Bowl

This past Sunday, Victor was at the Redskins game with a friend and Max and I ventured to a housewarming party and a going away party, then came home for naptime.  Once I sat down to relax, I found myself feeling particularly icky...like impending cold icky: sinus pressure in my cheeks, down my neck, in my ear, etc.  The last thing I wanted to do was make dinner, but I knew that my icky-ness would be magnified if I ate take-out food or heated up some frozen "party food" (like popcorn chicken or taquitos from Costco) for dinner.  I knew soup would be a good choice for dinner...but I didn't feel like soup.  We had some leftover quinoa for earlier in the week, plus lots of veggie options, so I decided to whip this up:


I followed a recipe for something similar to this a month or two ago, but it was bland bland bland.  So I revamped it.  And it rocks.

(Leftover) Quinoa Bowl

"Leftover" is in parentheses because you don't have to use leftovers to make it, but it's super duper easy if you do.  This recipe is a "make it your own" type because you can pretty much substitute in any meat, beans, or veggies based on what is in your fridge, pantry, or freezer.  You can use leftovers or you can make it fresh.  

Ingredients:
  • 1 cup raw quinoa
  • 14.5 oz can chicken/veggie broth
  • your choice of cooked meat, if you want it: choppped/shredded chicken, shrimp, salmon, ground turkey, etc.
  • 1 can beans of your choice, rinsed and drained
  • olive oil
  • 1/2 cup chopped onion
  • 1-2 cloves garlic, minced
  • 1/2 cup each of your choice of 3-4 chopped veggies: zucchini, squash, cherry tomatoes, bell peppers, spinach, mushrooms, broccoli, asparagus, etc.  You could also substitute a couple veggies for 8 oz. of frozen veggies (that's about half of a normal-size bag).


Directions:
  1. Combine quinoa and can of broth in a medium sauce pan.  Bring to boil, then simmer, covered, on low until all liquid is absorbed.
  2. If you are using frozen vegetables, prepare them according to package directions and drain.  You'll want to start this before you begin sauteeing vegetables in the skillet.
  3. Heat about 1 tablespoon of olive oil in a large skillet on medium-high heat.  Add chopped onion and saute until translucent.  Then add minced garlic and any fresh veggies you are using.  Add more olive oil as needed and saute until veggies begin to tenderize.
  4. Add rinsed/drained beans (and cooked frozen veggies, if you're using them), and meat.  Stir to combine and add more olive oil, if needed.  Season with salt and pepper to taste.  Heat for approximately 5 minutes or until beans and meat are heated through and vegetables are tender.
  5. Combine quinoa and meat/bean/veggie mixture in a bowl.  Top with shredded cheese, if desired.  And gobble it up!

I LOVE everything about this meal: you can throw it together on the fly and adjust the ingredients based on what you have.  I think what gives it all its flavor is the sauteed onions and garlic (which the recipe I had tried before didn't have), so make sure you include those!  For the bowl shown above, I used chopped zucchini plus half a combo bag of frozen peas, carrots, corn, and green beans.  Next time, I'm going to use some bell pepper and spinach, for sure.  And I think some avocado would be a great addition as a topping.  

How would you prepare your own (Leftover) Quinoa Bowl?

Wednesday, August 26, 2015

Recipes That Rock | Spicy Peanut Sauce

This week, I pulled out an oldie but a goodie in our house for dinner.  I've avoided it since Max started eating whatever we eat because I didn't think he could handle it, but I was able to adjust a few things to make it 15-month-old-friendly.  I don't remember where I originally found the recipe (the original was for "Spicy Peanut Noodles"), but I love it because it's very versatile.  I've made this sauce and served it with chicken or shrimp, over noodles or rice.  It works with it all!

Spicy Peanut Sauce


Ingredients
  • 1/2 cup peanut butter
  • 2 tablespoons white wine vinegar
  • 2 tablespoons soy sauce
  • 1 tablespoon brown sugar
  • 1 tablespoon grated fresh ginger (I've also used pickled ginger, and last time I omitted it because I didn't have any...still was yummy!)
  • 1 tablespoon sesame oil
  • 1/4 teaspoon cayenne pepper
  • 1 small clove garlic, minced
  • 3/4 cup very hot chicken broth
Directions
  1. Combine all ingredients in blender or food processor.  Blend/process until well-mixed, about 2 minutes.
  2. Pour sauce over your choice of noodles/rice, chicken/shrimp, and sauteed veggies and stir until well-coated.  **I prefer to pour the sauce over individual servings as opposed to over the entire batch, but that's a personal preference.
I like to make lots of sauteed veggies (onions, bell peppers, zucchini, yellow squash, broccoli) to go with this dish, and I typically use sesame oil as opposed to my usual EVOO.  Goes great with this sauce.  This is a great way to use leftover baked chicken or sauteed shrimp.  To make it a little less spicy for Max, I simply put in a tad less cayenne pepper.  He enjoyed dipping his fish sticks and pepper slices in the sauce (obsessed with dipping).


This sauce is awesome the next day, too.  I store the leftover sauce separate from the other leftovers and spoon it over it all before heating it up to eat the next day.

Leftovers on the couch during naptime watching Monday's episode of RHOC.  Nothing better.

If you like Thai peanut dishes, this sauce is for you!  Give it a try!

Tuesday, August 18, 2015

Recipes That Rock | Skinny Crab Cakes and Peach Summer Slaw

I'm not much of a seafood eater, but I'm trying to work it into my weekly meals more since the hubs has requested more fish-focused meals.  I make salmon once a week, but beyond that, I have a hard time feeling inspired to make fish dishes when I'm not a huge fish fan.

Lucky for me, I was flipping through Everyday with Rachael Ray a couple months ago and came across her Skinny Crab Cakes and Peach Summer Slaw recipe.  While I'm not big on most seafood, I LOVE a good crab cake, so I was super excited to whip these up.  I've always had good luck with Rachael's recipes, so I knew this was sure to be a winner.


Skinny Crab Cakes and Peach Summer Slaw
Serves 4

Crab cake Ingredients
  • 1.5 lb. lump or backfin crabmeat (I found a 1 lb. tub of lump crabmeat at Costco)
  • 1/2 cup chopped red bell pepper
  • 1/4 cup finely chopped fresh chives
  • 1/4 cup finely chopped parsley (I used dried parsley)
  • 1 large egg
  • 1 large egg white
  • 3 tbsp. canola mayonnaise (I used olive oil mayo)
  • 1 tsp. Dijon mustard
  • 1/2 tsp. Worcestershire sauce
  • 1 cup panko bread crumbs
  • 3 tbsp. olive oil for cooking
Peach Slaw Ingredients
  • 1 bag (14 oz) coleslaw mix
  • 2 medium peaches, cut into matchsticks
  • 2 pickled hot cherry peppers, sliced (couldn't find these, so I omitted them)
  • 2.5 tbsp. cider vinegar
  • 2 tbsp. sugar
  • 2 tbsp olive oil
Directions
  1. In a large bowl, toss the crabmeat, bell pepper and herbs.
  2. In a small bowl, whisk the egg, egg white, mayonnaise, Dijon, Worcestershire sauce, 1/4 tsp. salt and 1/4 tsp. pepper.  Add to the crab mixture and mix until combined.
  3. Add the panko to the crab mixture and mix gently.  Cover and refrigerate 30 minutes.
  4. In a medium bowl, toss the coleslaw mix, peaches, cherry peppers, vinegar, sugar, olive oil, and 1/2 tsp. salt.  Let stand, tossing often, for 30 minutes.
  5. Form the crab mixture into eight 1-inch-thick cakes.  In a large nonstick skillet, heat 1.5 tbsp. oil over medium.  Add 4 crab cakes; cook until browned and cooked through, about 4 minutes per side.  Place on a rack set in a baking sheet to keep crisp.  Repeat with remaining 1.5 tbsp. oil and crab cakes.  Serve with lemon wedges and slaw.

The crabmeat was a little expensive, but I loved knowing that my crab cakes were made from scratch and not full of "fillers."  These were a hit, even with Max!  I highly recommend trying it before the summer is over!


Thursday, August 13, 2015

Recipes That Rock | Chocolate Chip Cookies

If you were an avid Friends watcher like me (I may or may not own the entire series on DVD...and a fancy collector's display case), you remember the episode where Monica was working tirelessly to figure out Phoebe's grandmother's top-secret chocolate chip cookie recipe by deconstructing the last cookie from a frozen batch.  At the end of the episode, Phoebe remembers her grandmother told her the recipe came from her French great-great grandmother, named "Nestley Toulouse."


Words don't do it justice, so I hope you enjoyed this short, pixely video with Spanish subtitles!

Anyway, it's no wonder that Monica thought Phoebe's grandmother's cookies were so scrumptious.  Have you ever followed the recipe on the back of the Nestle Tollhouse chocolate chip bag?  It rocks!  I've been following this recipe for a few years now, and it does NOT disappoint!  The original recipe calls for nuts, but I omit those.  Give this recipe a try!


Chocolate Chip Cookies

Ingredients:
  • 2 1/4 cups all-purpose flour
  • 1 tsp baking soda
  • 1 tsp salt
  • 1 cup (2 sticks) butter or margarine, softened
  • 3/4 cup granulated sugar
  • 3/4 cup packed brown sugar
  • 1 tsp vanilla extract
  • 2 large eggs
  • One 12 oz bag Milk Chocolate or Semi-sweet morsels
Directions
  1. Preheat oven to 375 degrees.
  2. Combine flour, baking soda, and salt in small bowl.
  3. Beat butter, granulated sugar, brown sugar, and vanilla extract in large bowl until creamy.
  4. Add eggs, one at a time, beating well after each addition.
  5. Gradually beat in flour mixture.
  6. Stir in morsels.
  7. Drop by rounded tablespoon onto ungreased baking sheet.
  8. Bake 9-11 minutes or until golden brown.  Cool on baking sheets for 2 minutes, then remove to wire racks to cool completely.


Tip: If you forget to remove the butter from the fridge ahead of time to let it soften, just place it on top of the oven as it preheats.  Works just fine!


I love my cookie scoop!

Max's first taste of mommy's cookies.  He thinks they're so yummy that he threw a tantrum when Mommy said he couldn't have any more.
Do you have a favorite cookie recipe?  Is it an old family recipe or one you found on your own?