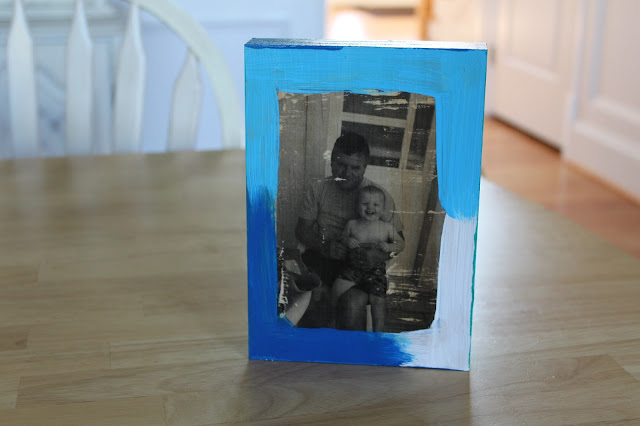
I came across a tutorial for DIY wooden photos on Pinterest years ago, and I was immediately excited to create my own; I love wooden decorative objects, and I think it's so cool to see the woodgrain come through the photos when you transfer them. The first wooden photo I made was a photo of my mom, sister, and me in Central Park back in 2012 (I learned the hard way that I needed to flip the photo before printing it that time). Then I made some wedding gifts for darling Nelle at simply love. I also put a couple of our engagement photos on wood for my in-laws. I think I had planned to make some wooden wedding photos for our house, but I must've forgotten over the past 2.5 years. #oops
 |
| I used a wooden plaque from Michaels for this first attempt a few years ago. |
After racking my brain trying to think of a good gift-from-Max idea for my father-in-law's birthday, I decided to make a wooden photo for him! I documented the process of making this gift so I could share it with you in case you wanted to try your hand at this, as well!
A few warnings before you decide to take this on yourself:
- The gel medium is a little pricey (an 8 oz. jar costs $15.99, but you can find cheaper ones online), so make sure you want to do this a couple of times to get your money's worth. The good news is, I bought my jar of gel medium in late 2012/early 2013 and it's still good today.
- The best way to get more bang for your buck is to get raw wood from your local hardware store (you can have them cut it for you, too!). I bought a 2in. by 6in. by 8ft. piece of pine a couple of years ago and had it cut into 8-inch lengths, giving me a stack of wooden blocks to have on hand any time the mood would strike to make a wooden photo. This is much cheaper than purchasing wooden plaques from your local craft store.
If you're still not scared away, here we go!
What you'll need:
- An untreated wooden surface (either a wooden plaque or a piece of lumber)
- A photo printed on regular paper (I've only done this in black and white) **be sure to "flip horizontally" on your computer before printing
- Gel medium
- Paint brush or foam brush
- business card or gift card
- Water and sponge/cloth
- Mod Podge
- Optional: acrylic paint
What you'll do:
- Print your photo's mirror image on regular printer paper in the size you prefer. You could have your photo take up the entire surface of your wooden piece, or make it smaller. (My wooden piece was 6.5 inches by 8 inches, and my photo was 4 inches by 6 inches.) Trim off the excess paper.
- Using your foam brush or paint brush, apply a thick layer of gel medium to your wooden surface. Be sure the entire surface has a good amount of the gel on it, otherwise your photo won't transfer well (I've seen other tutorials which brush the gel medium directly onto the photo). Immediately place your printed photo face down onto the gel.
You want much more than this on your surface.
- Using a business card or gift card, smooth out any bumps or bubbles. Allow to sit overnight to dry.
- The next day, use a sponge or cloth and some warm water to saturate the paper, then use your hands to gently rub away the paper. The color from your photo will be "stuck" to the wood underneath. You may need to re-wet the surface and repeatedly rub to get all of the paper off. My advice is to work in small quadrants, wetting only a small area at a time to rub.
- Once you have removed all of the paper, wipe the surface with a dry cloth and allow wood to dry.
This is the photo I added to the back. - If preferred, you can use acrylic paint to paint around the edges of your photo. Since this was a gift from Max, I wanted him to have a hand in its creation, so we painted. If you do not wish to paint, skip to step 7.
- After your surface is dry, brush on one or two coats of your preferred finish of Mod Podge (I used "Satin") to seal the photo. Allow to dry completely before handling.
This is a cool twist on a photo gift or keepsake for your home. The end product has a lot of character and looks so unique!
Max was so excited to give this project to his Vovo for his birthday last weekend. He couldn't wait to help him open it and show him what he made!


No comments:
Post a Comment
Please leave a comment! I would love to hear from you!