
I decided a few weeks ago that I want to implement an Advent calendar into our Christmas celebrations, and I've been on the hunt for some reusable DIY options. I wanted something that I could hang on the wall and use year after year, but I also wanted to be able to change it a bit each year to make it applicable to my kids and our family. I had already found and printed out some activity ideas for our Advent calendar, so I just needed to figure out the design.
During Max's naptime on Sunday, I whipped this one up using things I had lying around the house (I suppose it pays to be somewhat of a "craft product hoarder").

I used these designs as inspiration for my end product.
 |
| source |
 |
| source |
 |
| source |
When I saw this last one, I knew that I would be able to create my advent calendar from start to finish before Max even woke up from his nap! I already had everything I needed!
This was super easy to create, and even if you don't already have all of the materials on hand, you could spend as little as $15 at a craft store to get everything you needed. Chances are you already have some stuff at home.
DIY Advent Calendar
Materials:

- large open picture frame
- paint (I used spray paint, but you could also use acrylic paint and a brush)
- twine, string, or wire
- mini clothespins
- wrapping paper, cardstock, scrapbook paper, or gift tags (the can of tags pictured is from Target, but I didn't use them for this project)
- Not pictured: marker or pen, scissors, staple gun, decorative ribbon for hanging frame
What you'll do:
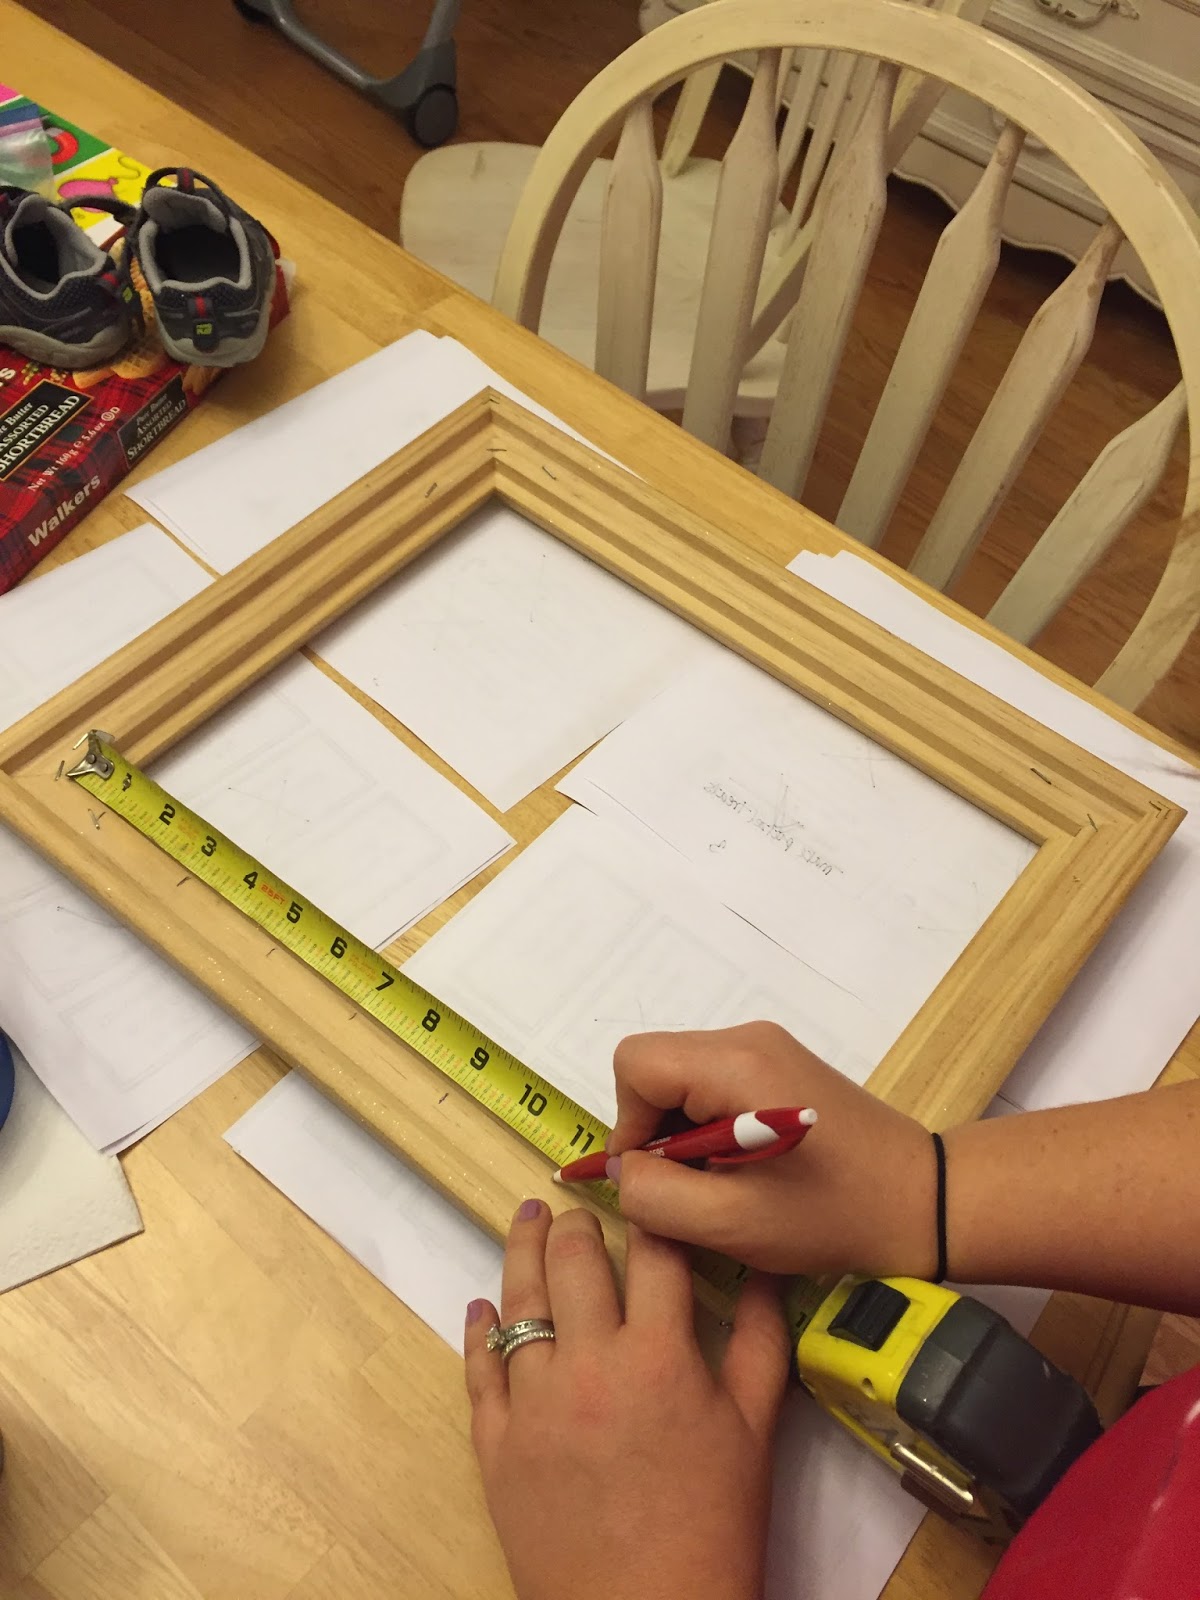
- Measure your frame opening to determine how you will space out your rows of twine/string/wire. You will need to have 24 items hanging on your calendar, so plan accordingly. You could also measure and cut your paper for each day at this time, if you want to be exact. The opening of my frame was 13 inches, so I marked at 1", 3", 5", 7", 9" and 11". Be sure to mark both sides of the opening.

- Paint your picture frame. Victor bought me this gold glitter spray paint at Home Depot a couple of years ago (it came in a set with silver glitter spray paint), and I've never used it before. I totally forgot that I had it and was originally going to use acrylic paint for the frame, but this just seemed like a better, more festive choice.

Isn't she a beaut?! - While your frame dries, choose activities for the 24 days leading up to Christmas. I found this list and this list on Pinterest and printed them out a week or two ago, then went through and identified the ones I liked for my family. I combined some from each list to create 24 activities for my family to do in December, and I even tweaked a few to reflect some traditions we already have (i.e. instead of making gingerbread cookies, we will make our pretzel treats; instead of watching Polar Express, we will watch Mickey's Christmas Carol). I chose a mixture of service-related activities and family-oriented ones.
- Consult your calendar (if you're a control freak like me) and schedule activities for specific days in December. I saved certain events for weekends and reserved others for weekdays. My birthday is on the 14th, and I love looking at Christmas lights, so I assigned "see the lights at the Mormon temple" for the night of my birthday. Victor's office Christmas party is scheduled for the 18th, so we will "go to a Christmas party" on that day.

- Write your activities on your designated papers. I eyeballed (meaning I didn't measure) folded sections of wrapping paper for my activities. I also printed out some cute numbers and glued them to the front of each folded piece of paper.

- Once your frame is dry, staple your string/twine/wire to the back of the frame across the lines you drew on the back of your frame. My super-smart husband suggested that I just staple one continuous length all the way down the frame to help keep the lines taut (you could also use this method if you wanted more slack lengths of string). It really cut down on cutting time.


- Attach your activities using your mini clothespins.

- Add your ribbon and tie it to your liking to aid in hanging your frame on the wall.


An extra step I needed to complete this project was to seal the paint because the glitter was coming off (as glitter tends to do). I just painted a coat of clear Mod Podge over the glitter paint to seal it in. If you use plain acrylic paint or a non-glittery spray paint, you could skip that step.
I am so thrilled with how this turned out, and I can't wait to start this tradition this year! I already have plans to save my scraps from gift-wrapping this year to use for the activities next year! I fully anticipate changing some of the activities from year to year based on what we enjoyed, what worked logistically and what didn't, and the ages of my kids. Also, once Max gets a little older, I plan to mix the numbers up, like in the photo below, as opposed to posting them in numerical order. The former kindergarten teacher in me knows that this can help reinforce number sense. Always learning!
 |
| source |
Do you use an Advent calendar? What are some of your favorite things to do in December to celebrate the holidays?
That is such a great holiday project. I was just wanting an advent calendar
ReplyDelete